
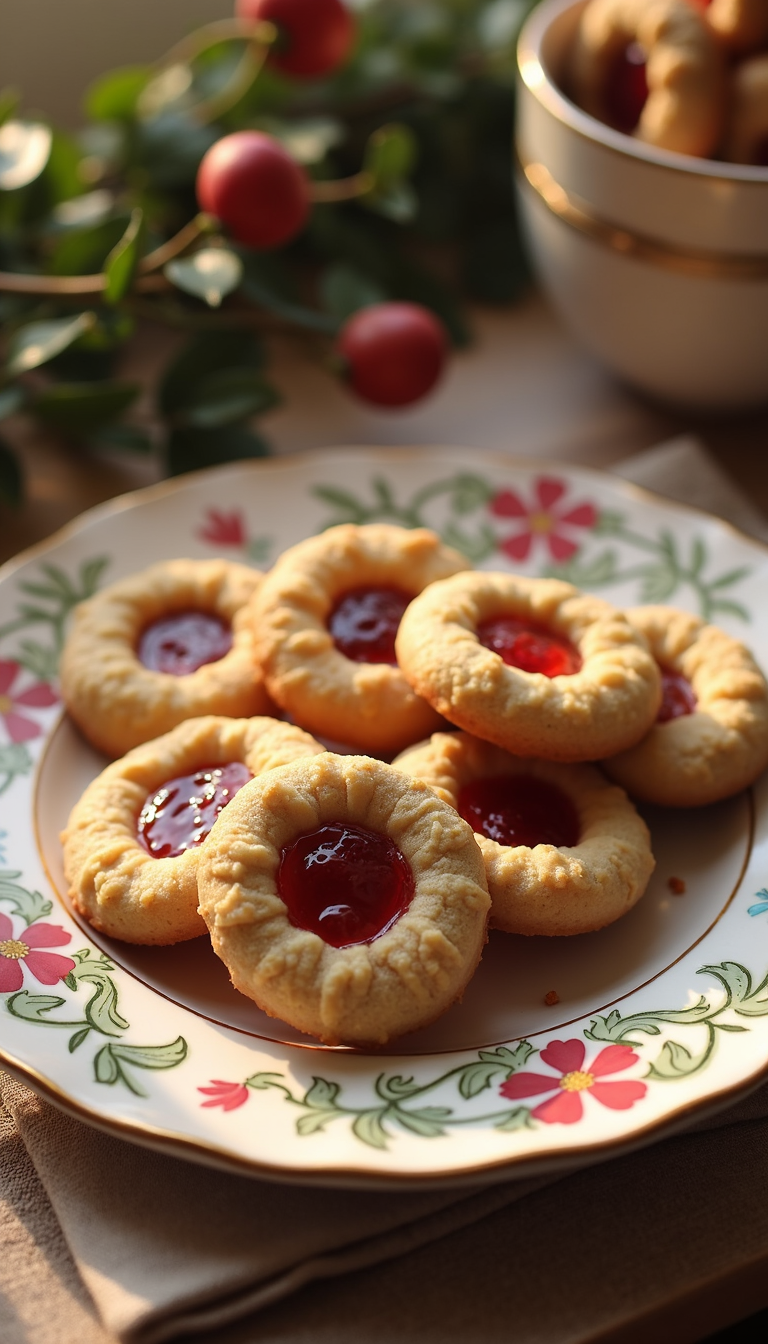
Thumbprint Jam Cookies are delightful little treats that capture the essence of comfort in every bite. With their buttery, melt-in-your-mouth texture and a sweet dollop of fruit jam nestled in the center, these cookies not only please the palate but also evoke a sense of nostalgia that many of us cherish. Each bite is a harmonious blend of flavors and textures that transports you to a cozy kitchen filled with the warm aroma of freshly baked goods.
The Origin of Thumbprint Cookies
The history of Thumbprint Jam Cookies can be traced back to various cultures, with each adapting the basic concept to their local ingredients and traditions. While some may argue that they originated in Sweden, where they are known as “Hallongrotta,” meaning raspberry cave, others believe that variations exist in Jewish baking traditions. These cookies have been a staple during Jewish holidays, particularly Purim, symbolizing the beauty of sharing and celebrating with loved ones.
As we delve into their history, it’s fascinating to note how these cookies have transcended borders. In Germany, they are often referred to as “Spitzbuben” and are typically filled with apricot or raspberry jam, while in the United States, they have taken on a life of their own, often filled with anything from strawberry to chocolate spreads. The thumbprint technique itself is not only visually appealing but also serves a practical purpose—creating a perfect nest for the jam to sit in, ensuring that each cookie is a delightful surprise.
The Allure of Unique Ingredients
At first glance, Thumbprint Jam Cookies may seem deceptively simple, but it’s the quality of the ingredients that truly makes them shine. The dough primarily consists of butter, sugar, flour, and eggs, each playing a crucial role in achieving that desirable texture. The butter, when creamed with sugar, adds a richness that envelops your taste buds, while the flour provides the structure. The key here is to use high-quality, unsalted butter for that pure, creamy flavor.
What sets these cookies apart, however, is the jam. While traditional recipes may call for specific fruit preserves, this is where you can let your creativity flourish. Think beyond the ordinary! Imagine a zesty lemon curd or a bold cherry compote taking center stage. The jam is not just a filling; it’s the heart of the cookie, infusing each bite with bursts of fruity goodness. The contrast between the sweet, slightly tart jam and the buttery cookie creates a delightful dance of flavors that is nothing short of enchanting.
The Art of Cooking Techniques
Creating the perfect Thumbprint Jam Cookies is as much about technique as it is about ingredients. The process begins by softening the butter to room temperature, allowing it to cream beautifully with the sugar until it becomes light and fluffy. This step is essential; it incorporates air into the dough, contributing to the cookies’ melt-in-your-mouth quality.
When it comes to shaping the cookies, the thumbprint technique is both fun and satisfying. Using your thumb or the back of a spoon, gently create an indentation in the center of each cookie. It’s important to be gentle here; you want to make a cozy little cradle for the jam without compromising the structural integrity of the cookie.
Baking them to perfection involves closely monitoring the timing and temperature. The edges should be lightly golden while the center remains soft. This is where the magic happens; as the cookies cool, they firm up just enough to hold the jam without becoming too crisp.
In conclusion, Thumbprint Jam Cookies are more than just a sweet treat. They are a celebration of history, culture, and the simple joys of baking. Each step of the process is an invitation to engage with your ingredients, to experiment, and to share with those you love. As you embark on this baking adventure, remember that the most important ingredient is the joy you bring into the kitchen. So roll up your sleeves, gather your favorite jams, and let’s create something beautiful together!

Thumbprint Jam Cookies
Description
These thumbprint jam cookies are a classic treat, featuring a buttery base and a sweet jam center. Perfect for tea time or as a sweet snack, they are sure to impress!
Ingredients
Thumbprint Jam Cookies Ingredients
Instructions
Preparation of the Dough
-
Cream the Butter and Sugar
In a large mixing bowl, beat together 1 cup of softened unsalted butter and 3/4 cup of granulated sugar using an electric mixer on medium speed until the mixture is light and fluffy, about 2-3 minutes.Make sure the butter is at room temperature for easy creaming. Scrape down the sides of the bowl to ensure everything is well combined. -
Add the Eggs and Vanilla
Add 1 large egg and 1 teaspoon of pure vanilla extract to the butter-sugar mixture. Beat until fully incorporated and smooth.Using room temperature eggs helps the mixture blend better. If you want a hint of almond flavor, you can substitute half the vanilla with almond extract. -
Combine Dry Ingredients
In a separate bowl, whisk together 2 cups of all-purpose flour, 1/2 teaspoon of baking powder, and a pinch of salt. Gradually add the dry ingredients to the wet mixture, mixing until just combined.Be careful not to over-mix to keep the cookies tender. Sift the flour for a lighter texture if desired.
Shaping and Baking the Cookies
-
Chill the Dough
Cover the dough with plastic wrap and chill in the refrigerator for at least 30 minutes. This helps the cookies hold their shape when baking.If you're short on time, you can skip this step, but the cookies might spread more in the oven. -
Preheat the Oven
While the dough is chilling, preheat your oven to 350°F (175°C). Line two baking sheets with parchment paper.Preheating is crucial for even baking, so don’t skip this step! -
Form the Cookies
Scoop tablespoon-sized amounts of dough and roll them into balls. Place them on the prepared baking sheets, spacing them about 2 inches apart. Use your thumb or the back of a teaspoon to make an indentation in the center of each ball.Don’t worry if the dough cracks a little; just pinch it back together gently. -
Fill with Jam
Spoon your favorite jam or preserves—about 1/2 teaspoon—into each indentation. Raspberry, apricot, or strawberry works wonderfully!Make sure not to overfill, as the jam can bubble over while baking. -
Bake the Cookies
Bake in the preheated oven for 12-15 minutes, or until the edges are lightly golden. The centers might still look slightly soft; that’s okay!Rotate the trays halfway through baking to ensure even cooking.
Cooling and Enjoying
-
Cool on a Wire Rack
Once baked, remove the cookies from the oven and let them cool on the baking sheets for about 5 minutes before transferring them to a wire rack to cool completely.This allows the cookies to set properly and makes them easier to move without breaking. -
Serve and Store
Enjoy your thumbprint jam cookies warm, or store them in an airtight container at room temperature for up to a week.These cookies are also freezer-friendly! Just layer them between sheets of parchment paper before freezing.
Note
- Use room temperature butter for easier creaming with sugar.
- Ensure the dough is chilled for at least 30 minutes to prevent spreading.
- Experiment with different jams or preserves for unique flavors—raspberry, apricot, or even chocolate hazelnut spread work beautifully.
- For a nutty twist, incorporate finely chopped nuts into the dough or use them as a topping around the jam.
- If the jam is too thick, warm it slightly for easier spooning into the cookie centers.
- Bake the cookies until the edges are lightly golden; this ensures a crisp texture while keeping the centers chewy.
- Store cookies in an airtight container at room temperature for up to a week; they may soften over time.
- For freezing, place the baked cookies in a single layer on a baking sheet until solid, then transfer to a freezer bag for up to three months.
- To enhance the flavor, add a splash of vanilla extract or almond extract to the dough.