

BestRecipesBlog.com is a participant in the Amazon Services LLC Associates Program, an affiliate advertising program designed to provide a means for sites to earn advertising fees by advertising and linking to Amazon.com. As an Amazon Associate, I earn from qualifying purchases.
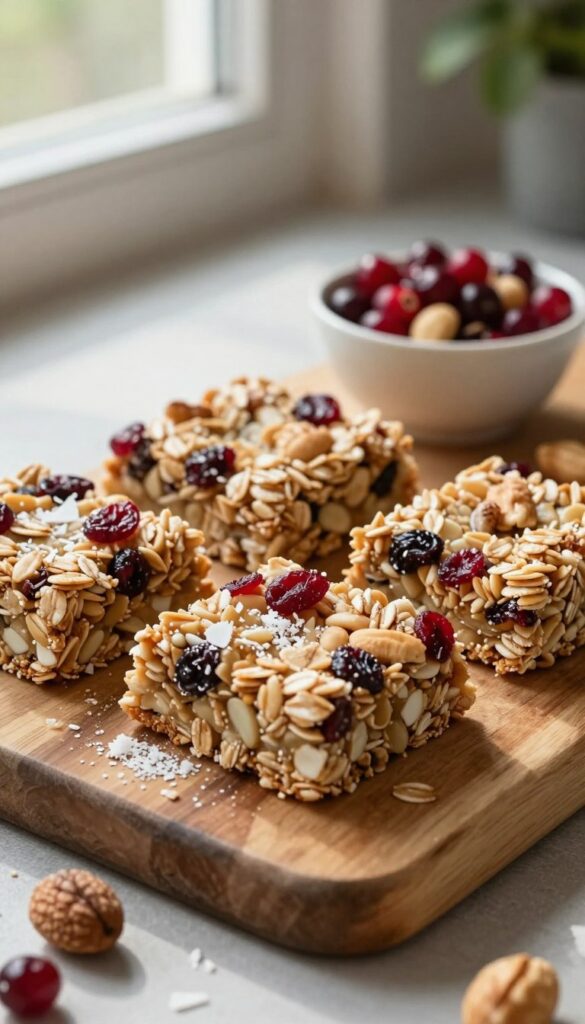
These No-Bake Cranberry Nut Granola Bars are chewy, slightly sweet, and packed with hearty oats, crunchy nuts, and tart dried cranberries. They’re an easy, wholesome snack made with pantry staples and no oven required—perfect for breakfast on the go, lunchboxes, or a healthy afternoon pick-me-up.
Ingredients
- 2½ cups rolled oats
- ¾ cup mixed nuts, chopped (almonds, walnuts, pecans, or cashews)
- ½ cup dried cranberries
- ½ cup creamy peanut butter or almond butter
- ⅓ cup honey or maple syrup
- 1 teaspoon vanilla extract
- ¼ teaspoon salt
Optional add-ins:
- 2 tablespoons chia seeds or ground flaxseed
- ¼ teaspoon cinnamon
- ¼ cup mini chocolate chips or white chocolate chips
Equipment Needed
- Medium mixing bowl
- Small saucepan or microwave-safe bowl
- Spatula or wooden spoon
- 8×8-inch baking dish
- Parchment paper
Tips & Variations
- Extra crunch: Lightly toast the nuts before chopping for deeper flavor.
- Nut-free option: Use sunflower seed butter and pumpkin seeds instead of nuts.
- Sweeter bars: Add an extra tablespoon or two of honey or maple syrup.
- Holiday twist: Add orange zest and a pinch of nutmeg for a festive flavor.
- Storage: Store bars in an airtight container in the refrigerator for up to 7 days or freeze for up to 2 months.
No-Bake Cranberry Nut Granola Bars
Description
These no-bake cranberry nut granola bars are a deliciously wholesome treat packed with nutrients, ideal for a quick breakfast or an on-the-go snack.
Ingredients
Ingredients for No-Bake Cranberry Nut Granola Bars
Instructions
Prepare the Base
-
Gather Your Ingredients
Start by measuring out your oats, nuts, and dried cranberries. This will make it easier to mix everything together later.Feel free to mix and match nuts based on your preference—almonds and walnuts work beautifully! -
Mix Dry Ingredients
In a large mixing bowl, combine the rolled oats, chopped nuts, dried cranberries, and a pinch of salt. Stir until evenly mixed.For an extra flavor kick, consider adding a teaspoon of cinnamon or vanilla extract to the dry mix.
Create the Binding Mixture
-
Melt the Sweetener
In a small saucepan over low heat, combine honey (or maple syrup) and peanut butter. Stir until melted and smooth.Be careful not to overheat; you want it warm enough to mix but not bubbling. -
Combine Mixtures
Pour the melted mixture over the dry ingredients and stir vigorously until everything is well-coated. It may take a little effort, but stay with it!If it's too sticky, you can add a tiny bit of water to loosen it up.
Shape and Chill
-
Line a Pan
Line an 8x8 inch baking pan with parchment paper, making sure to leave some overhang for easy removal later.This step is crucial for easy lifting; don’t skip it! -
Press the Mixture
Transfer the mixture into the lined pan and press down firmly with a spatula or your hands until evenly distributed and compact.The more compact, the better—they’ll hold together nicely when cut! -
Chill to Set
Refrigerate the pan for at least 2 hours, or until the bars are firm. Patience is key here!If you’re in a hurry, you can pop them in the freezer for about 30 minutes.
Cut and Enjoy
-
Cut into Bars
Once set, lift the granola mixture out of the pan using the parchment overhang and place it on a cutting board. Cut into bars or squares.Using a sharp knife will make slicing easier; you can also warm the knife slightly for a cleaner cut. -
Store Your Bars
Store the granola bars in an airtight container in the fridge for up to a week or in the freezer for longer freshness.Layer parchment paper between bars if stacking to prevent sticking.
Note
- Use old-fashioned rolled oats for optimal texture; avoid instant oats.
- Substitute honey with maple syrup or agave nectar for a vegan option.
- Toast the nuts and seeds lightly in a dry skillet to enhance their flavor.
- Add a pinch of sea salt to balance sweetness and elevate overall taste.
- Incorporate additional mix-ins like chocolate chips or dried fruits based on preference.
- Press the mixture firmly into the pan to ensure bars hold together once set.
- Chill the bars in the refrigerator for at least 2 hours before cutting.
- Store in an airtight container for up to one week, or freeze for longer shelf life.
- For a protein boost, consider adding nut butter or protein powder to the mixture.
granola bars, no-bake, healthy snacks, cranberries, nuts