

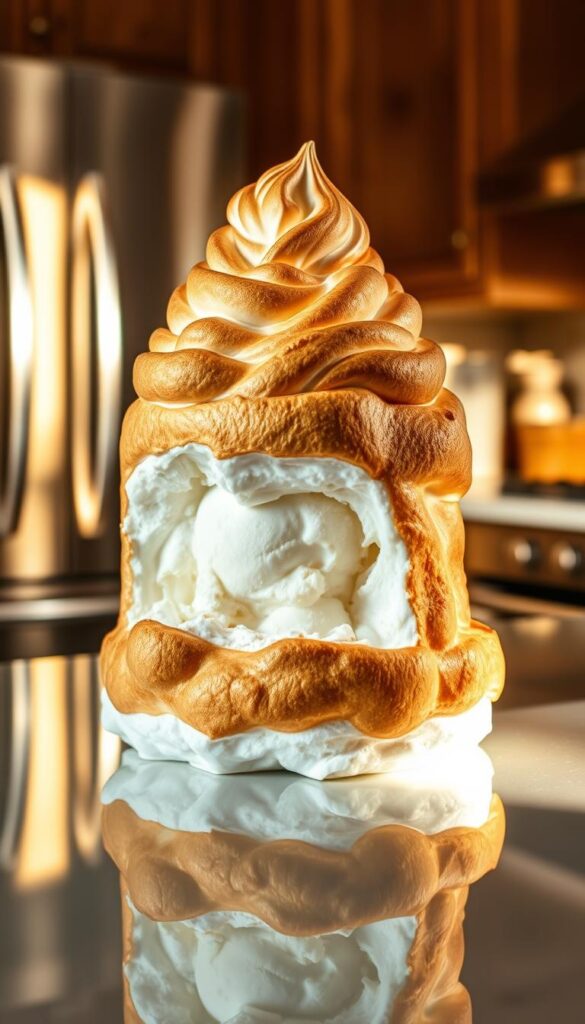
Baked Alaska is a stunning dessert that combines the silky smoothness of ice cream with the airy lightness of meringue, all enveloped in a warm, golden crust. This delightful contrast between temperatures and textures makes it a show-stopping finale for any dinner party. Imagine cutting into a perfectly browned meringue shell, revealing a chilled core of ice cream atop a soft sponge cake base—the harmony of flavors and sensations is simply mesmerizing.
Origin and History
The origins of Baked Alaska trace back to the 19th century, a testament to culinary creativity and innovation. It’s believed that the dessert was first introduced to honor the acquisition of Alaska by the United States in 1867. The name itself evokes a sense of grandeur and mystery, much like the vast, untamed wilderness for which it is named. Over the years, Baked Alaska has been celebrated in various forms across the globe, each iteration maintaining the classic elements that define it. Its reputation as a dessert for special occasions has persisted, making it a symbol of celebration and indulgence.
Unique Ingredients and Techniques
What makes Baked Alaska truly unique is the seamless combination of contrasting elements. The meringue, whipped to soft peaks and then browned to perfection, serves as both an insulating layer and a delightful topping. The ice cream at the center can be customized to suit any palate, whether you prefer the classic vanilla or more adventurous flavors like pistachio or raspberry. The base, often a simple sponge cake, provides a sturdy foundation that soaks up any melting ice cream, ensuring each bite is a balance of creamy, sweet, and slightly crisp textures. The technique of baking something frozen might sound paradoxical, but it’s this very paradox that makes Baked Alaska so intriguing. By ensuring the meringue is thick enough, you create a barrier that protects the ice cream from the oven’s heat, allowing for that magical moment when the dessert is revealed in all its glory.
Baked Alaska
Ingredients
Sponge Cake Base
Ice Cream Layer
Meringue Topping
Instructions
Preparing the Cake Base
-
Gather Your Ingredients
Start by gathering all the ingredients for the cake base. You'll need a sponge cake or pound cake that fits the size of your ice cream mold.Feel free to use store-bought cake if you're short on time. -
Cut the Cake
Trim the cake to fit perfectly as a base for your ice cream dome. Ensure it’s snug, as this will form the foundation of your Baked Alaska.Using a serrated knife can make cutting the cake easier and more precise.
Assembling the Ice Cream Dome
-
Choose Your Ice Cream
Select your preferred flavors of ice cream. Soften them slightly to make spreading easier.Experiment with complementary flavors like chocolate and raspberry for an exciting twist. -
Line the Mold
Line a bowl with plastic wrap, leaving enough overhang to cover the top later. This will help you remove the ice cream dome effortlessly.Ensure the plastic wrap is smooth to avoid wrinkles in your ice cream dome. -
Layer the Ice Cream
Spread your first layer of ice cream evenly in the lined mold. Add additional layers as desired, smoothing each one with a spatula.Freeze each layer for about 30 minutes before adding the next to keep them distinct and vibrant. -
Seal with Cake
Place your pre-cut cake on top of the final ice cream layer, pressing gently to adhere it. Wrap the plastic wrap over the cake to seal.Allow it to freeze for at least 4 hours or overnight for best results.
Making the Meringue
-
Prepare Meringue Ingredients
Gather egg whites, sugar, and cream of tartar for the meringue. Make sure your mixing bowl and beaters are grease-free for perfect peaks.Room temperature egg whites whip up more easily and consistently. -
Whip the Meringue
Beat the egg whites until foamy, then gradually add sugar and cream of tartar. Continue beating until stiff peaks form.Don’t rush this step. Patience is key to achieving a glossy, stable meringue.
Assembling and Baking
-
Preheat the Oven
Preheat your oven to 500°F (260°C).A hot oven is crucial for quickly browning the meringue without melting the ice cream. -
Unmold the Ice Cream
Remove the ice cream dome from the mold by lifting it out with the plastic wrap. Invert it onto the cake base on a baking sheet.If the ice cream is stubborn, run warm water over the outside of the mold briefly. -
Apply the Meringue
Spread the meringue over the ice cream and cake, completely sealing it. Create peaks and swirls with the back of a spoon for a decorative effect.Ensure there are no gaps in the meringue; it acts as insulation for the ice cream. -
Bake Quickly
Place the assembled Baked Alaska in the oven for 3-5 minutes, or until the meringue is golden brown.Keep an eye on it to prevent the meringue from burning.
Serving Suggestions
-
Slice and Serve
Allow the Baked Alaska to rest for a couple of minutes before slicing with a sharp knife. Serve immediately to enjoy the contrast of temperatures.Wipe the knife between slices for cleaner cuts.
Note
When preparing Baked Alaska, ensure that the ice cream is very firm before assembling. It's essential to allow the cake to cool completely to prevent melting when adding the ice cream. Toast the meringue using a kitchen torch for precise control over browning, or bake in a hot oven for a short period, watching carefully to avoid overcooking. Use a serrated knife for clean slices, and serve immediately for best texture contrast. For a twist, experiment with different ice cream flavors or add a layer of fruit preserves between the cake and ice cream for added complexity.