

BestRecipesBlog.com is a participant in the Amazon Services LLC Associates Program, an affiliate advertising program designed to provide a means for sites to earn advertising fees by advertising and linking to Amazon.com. As an Amazon Associate, I earn from qualifying purchases.
There’s something truly magical about the aroma of freshly baked rolls wafting through the kitchen. Homemade fluffy rolls are not just a side dish; they are the warm embrace that completes any meal. With their tender, pillowy texture and a golden-brown crust, these rolls can make even the simplest dinner feel like a special occasion.
The Origin of Fluffy Rolls
Fluffy rolls have a rich and varied history that stretches across cultures and generations. Many food historians trace the origins of bread rolls back to ancient civilizations, where grains were ground and mixed with water to create rudimentary forms of bread. As time passed, different regions developed their own unique variations, leading to the light and airy rolls we cherish today. In many households, these rolls symbolize comfort and togetherness, often featured at family gatherings and festive occasions.
Unique Ingredients and Flavors
What sets these rolls apart is the combination of quality ingredients and a few secret techniques. The use of bread flour—not all-purpose—gives the rolls that delightful chewiness, while the addition of milk and butter enriches the dough, creating a flavor profile that’s both subtle and indulgent. A touch of honey adds a whisper of sweetness that balances beautifully with savory dishes, making these rolls incredibly versatile. The magic truly happens when you let the dough rise; it transforms into a fluffy cloud of goodness that’s hard to resist.
Cooking Techniques
Perfecting homemade rolls is as much about technique as it is about ingredients. The kneading process is crucial; it’s during this time that gluten develops, giving the rolls their structure. A gentle touch is key—think of it as a dance between you and the dough. Allowing the rolls to rise in a warm environment encourages their fluffy texture, and brushing them with melted butter just before serving adds a glossy finish that’s absolutely irresistible. With a few simple steps, you’ll find yourself creating rolls that are not just food, but a heartfelt expression of love and warmth.
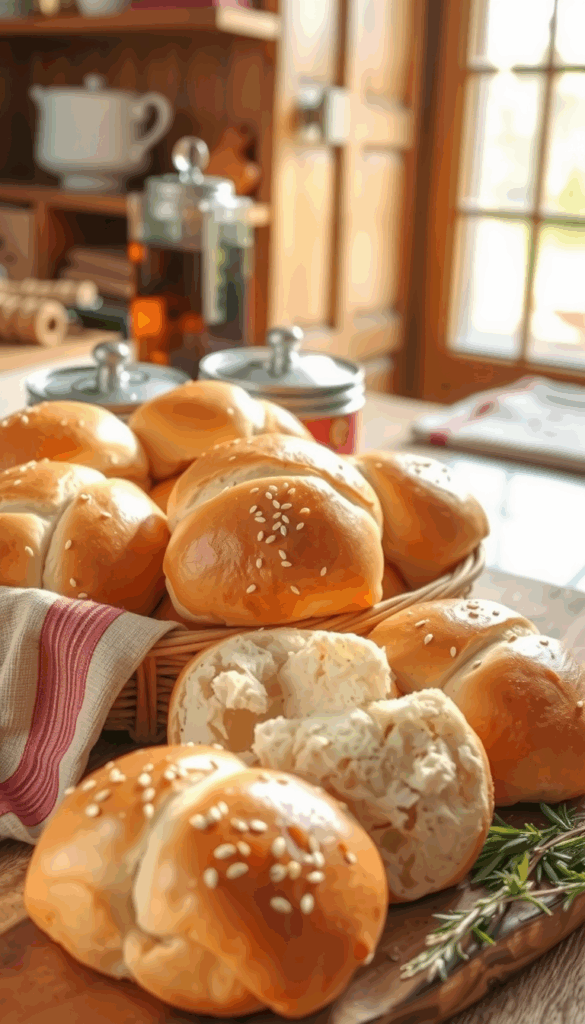
Homemade Fluffy Rolls
Description
Indulge in these soft, fluffy rolls that melt in your mouth. Perfect as a side for any meal or simply enjoyed warm with butter, these rolls are a family favorite!
Ingredients
Ingredients for Homemade Fluffy Rolls
Instructions
Preparing the Dough
-
Activate the Yeast
In a small bowl, combine 1 cup of warm milk (about 110°F) with 2 tablespoons of sugar and 2¼ teaspoons (one packet) of active dry yeast. Stir gently and let it sit for about 5-10 minutes until frothy.Make sure your milk is warm, but not too hot! If it’s too hot, it can kill the yeast. -
Mix the Dry Ingredients
In a large mixing bowl, whisk together 4 cups of all-purpose flour, 1 teaspoon of salt, and 2 tablespoons of melted butter. This will create a lovely base for your rolls.You can use bread flour for an even fluffier texture! -
Combine Wet and Dry
Once your yeast mixture is frothy, pour it into the flour mixture. Add 2 large eggs and mix until a dough begins to form.Don't worry if it looks a bit shaggy at first; that's normal!
Kneading the Dough
-
Knead to Perfection
Turn the dough out onto a lightly floured surface and knead it for about 8-10 minutes until smooth and elastic. You can also use a stand mixer with a dough hook if you prefer.If the dough is too sticky, sprinkle in a bit more flour as you knead, but try not to overdo it!
First Rise
-
Let it Rise
Place the dough in a greased bowl, cover it with a clean kitchen towel, and let it rise in a warm place for about 1-2 hours, or until it has doubled in size.Tip: Preheat your oven to the lowest setting for a minute, then turn it off and place the dough inside—perfect cozy spot for rising!
Shaping the Rolls
-
Shape the Rolls
Once the dough has risen, punch it down to release the air. Divide it into 12 equal pieces and shape each piece into a ball. Place them in a greased 9x13 inch baking dish.Make sure to tuck the edges under for a smooth finish—this helps them rise nicely!
Second Rise
-
Final Rise
Cover the rolls with the kitchen towel again and let them rise for another 30-45 minutes until puffy.This step is crucial for that fluffy texture—don't rush it!
Baking the Rolls
-
Preheat and Bake
Preheat your oven to 350°F (175°C). Bake the rolls for 20-25 minutes, or until they turn golden brown on top.If they brown too quickly, you can cover them lightly with foil halfway through baking.
Finishing Touches
-
Brush with Butter
Remove the rolls from the oven and brush the tops with melted butter for that irresistible shine and flavor.This step truly elevates the rolls—trust me! -
Cool and Serve
Let the rolls cool in the pan for about 10 minutes before transferring them to a wire rack. Serve warm or at room temperature.These are best enjoyed fresh, but you can store leftovers in an airtight container!
Note
- Ensure your yeast is fresh for optimal rise; check the expiration date.
- Use room temperature ingredients, especially the milk and eggs, to help with dough activation.
- Knead the dough until it’s smooth and elastic, about 8-10 minutes; this develops gluten for that fluffy texture.
- Allow the dough to rise in a warm, draft-free area; a good method is placing it in an oven with just the light on.
- For a richer flavor, consider adding a tablespoon of honey or sugar during the mixing stage.
- Brush the tops of the rolls with melted butter just after baking for a beautiful sheen and extra flavor.
- These rolls freeze well; wrap them tightly in plastic wrap and foil, then store in an airtight container.
- If you want to enhance the texture, try adding an egg wash before baking for a golden crust.
- Experiment with herbs or garlic powder in the dough for added flavor variations.
- For a softer roll, avoid overbaking; they should be lightly golden and sound hollow when tapped on the bottom.